Skip to content
If you’re looking to elevate your interior design, it’s time to stop thinking of your ceiling as a utility surface and start seeing it as the fifth wall. In the historic homes of the South Shore, wallpapering the ceiling is becoming the go-to technique for adding immediate architectural depth without a full-scale renovation.
However, moving from a standard painted white ceiling to a wallpapered focal point requires more than just a ladder and a roll of paper. Gravity, high humidity from the Atlantic, and the unique textures of older New England plaster all play a role in the success of your project. In this guide, we will explore the best styles for overhead applications and the professional prep steps required to ensure your ceiling remains a stunning feature of your house.
Why South Shore Homeowners Are Looking Up – Literally
The “fifth wall” trend has officially hit coastal Massachusetts. Designers are shifting from traditional, neutral ceilings to patterns that attract attention upwards. In the South Shore, where many homes feature lower ceiling heights in older additions, wallpapering a ceiling can actually make a room feel more expansive by blurring the hard line where the wall ends and the ceiling begins.
What Makes South Shore Homes Uniquely Suited (and Challenged) for This Project
- Architectural Appeal: In the cozy Capes and Colonials of Hingham and Marshfield, wallpaper creates a jewel box effect. It adds character to intimate rooms and makes lower ceilings feel intentionally curated.
- Historic Plaster: Pre-1980s homes often have solid plaster ceilings. While these provide a smooth, substantial canvas, they are prone to hairline cracks. Textured wallpaper is a stylish way to mask these imperfections without a full renovation.
- Coastal Climate: Living in Duxbury or Scituate means dealing with salt air and high humidity. These seasonal shifts can cause seams to lift, making professional-grade, high-tack adhesives a non-negotiable requirement for a lasting bond.
The Best Wallpaper Styles for Ceilings

Choosing a pattern for a ceiling is different than choosing one for a wall. Light hits the surface overhead differently, and the lack of furniture to break up the pattern means you need to be strategic.
Patterns That Work Overhead Without Dominating the Room
When wallpapering the ceiling, small-scale botanicals, soft geometric grids, and tonal damasks are usually the safest and most effective choices. Oversized patterns can sometimes feel like they are falling on the room, especially in smaller colonial-style bedrooms. A popular local choice is a navy or sea-salt grasscloth, which provides a textured, nautical anchor to a coastal living room without the busyness of a print.
When to Use Textured Wallpaper
Textured wallpaper is a brilliant solution for hiding minor surface imperfections. If your plaster ceiling has small bumps or a sand finish that you aren’t ready to sand down, a heavy-duty textured vinyl can mask those flaws while adding a luxury, tactile feel to the space.
Peel-and-Stick vs. Traditional Wallpaper
While peel-and-stick is tempting for DIYers, gravity is not its friend. On a ceiling, the constant downward pull often causes self-adhesive papers to fail within the first season. Traditional paste-the-wall or paste-the-paper methods are strongly recommended for a long-term installation due to their superior bond.
Preparing Your Ceiling the Right Way
Surface prep is the single most overlooked step by homeowners, and it is the primary reason for failure. You cannot simply apply paper over old flat paint and expect it to stay.
Assessing Your Ceiling Type Before You Buy a Single Roll
While modern drywall is usually ready for adhesive, older South Shore plaster often requires a bonding primer to ensure a stable grip. Existing textures, such as popcorn finishes, must be scraped and skim-coated to create a flat surface. Finally, identify high-moisture areas or glossy paints early, as these require specialized primers to prevent the paper from peeling over time.
Priming and Sizing
This involves applying a diluted wallpaper paste or a specialized primer-sealer to the ceiling. This seals the porous plaster or drywall, preventing it from absorbing moisture from your adhesive too quickly. On older South Shore homes, an oil-based primer is often necessary to block old water stains or smoke damage before the paper goes up.
Pattern Matching Overhead
If you start at one wall and work across, any slight misalignment in the house’s structure will result in a crooked pattern by the time you reach the opposite side. Using a chalk line to mark a perfectly straight center axis is the only way to ensure a professional result.
How Much It Costs to Wallpaper a Ceiling
Budgeting for this project requires accounting for the ceiling premium. Because of the physical strain and the need for scaffolding, professional labor for ceilings typically costs 30–50% more than standard wall installation.
Material Costs: What You’re Actually Paying Per Roll
High-quality wallpaper typically ranges from $50–$150 per roll. When budgeting, consider these common material tiers:
- Standard Vinyl: Durable and budget-friendly; ideal for high-traffic or damp areas.
- Designer Prints: Premium patterns that offer unique, eye-catching aesthetics.
- Specialty Textures: High-end grasscloth or fabric-backed papers for luxury depth.
- Waste Factor: Plan for an extra 15–20% in materials to account for pattern matching and trimming around overhead fixtures.
For most ceiling projects, total material cost comes down to two things: the type of paper you choose and how much extra is needed for pattern alignment. More detailed patterns and specialty materials increase both the price per roll and the amount of waste, which can push the total higher than expected.
Labor Costs and What Local Contractors Typically Charge
In the Greater South Shore area, professional wallpapering services for a standard room typically ranges from $600–$1,200. Because wallpapering ceilings is a two-person job that requires scaffolding and intensive surface prep, local pros usually charge more than they would for a standard wall.
Common Mistakes That Cause Wallpaper to Fail on Ceilings
Wallpapering overhead is a constant battle against gravity. Most failures stem from shortcuts taken during the application phase. Avoiding these common pitfalls will ensure your ceiling remains a stunning focal point for years to come.
- Adhesive Mistakes and Sagging: To prevent sagging or peeling, use a heavy-duty, high-tack paste. Avoid applying too little adhesive, which leaves dry gaps, and always factor in local humidity levels, as moisture can significantly extend or shorten your drying time.
- Alignment and Pattern Errors: These errors usually occur when homeowners rush the layout or fail to use a level for every strip. Because wallpaper can shift slightly as it dries, precise measurement and a slow, careful application are the only ways to ensure patterns match perfectly.
- Improper Surface Prep: Without a properly prepared surface, the adhesive will soak into the drywall or plaster too quickly, causing the paper to bubble or lift at the corners. Always ensure your ceiling is clean, smooth, and correctly primed before the first strip goes up.
These issues often don’t show up immediately. In many cases, the paper looks fine at first but starts to sag, separate, or misalign within weeks. Taking the time to get the prep, layout, and adhesive right is what determines whether the finish holds up or needs to be redone.
Maintaining Your Ceiling Wallpaper for the Long Haul

Once your ceiling is transformed, it requires a different care routine than your walls. Because dust and cobwebs settle differently on overhead surfaces, proactive maintenance is key to keeping the colors vibrant and the edges secure.
Cleaning and Seasonal Care
For most vinyl or coated papers, a light dusting with a microfiber swivel mop once a month is sufficient. Avoid using heavy-duty water or steam cleaners, as excess moisture can seep into the seams. In coastal areas such as Scituate or Duxbury, it’s important to monitor your wallpaper during the peak of summer. If you notice a seam beginning to lift due to humidity, promptly address it with a specialized seam repair adhesive.
Handling Lifts and Touch-Ups
If you notice a small bubble or a lifting edge, don’t ignore it. A lifted seam can act as a catch for dust, making the gap look like a dark, unsightly line over time. While small repairs can be handled with a fine-brush adhesive applicator, widespread sagging usually signals that the original surface wasn’t primed or sized correctly during the initial installation.
When to Hire a Professional and How to Find a Good One Locally

While a small powder room might be a manageable DIY, larger living spaces or high-vaulted entries are best left to the pros. Wallpapering the ceiling is physically exhausting and requires a two-person team to prevent the heavy, pasted paper from folding or tearing under its own weight.
To find a quality local installer, look for contractors who specialize specifically in wallcoverings rather than general interior painting. Check for portfolios that showcase overhead work and ask about their experience with South Shore climate challenges, such as humidity-resistant adhesives.
If you are looking for a flawless finish that stands up to our coastal environment, our team is here to help. We specialize in precision wallpapering of ceiling projects throughout the South Shore, ensuring we execute your vision with technical excellence.
Contact Quality Preferred Painting today to schedule a consultation and give your home the “fifth wall” it deserves!
FAQ
1. How difficult is wallpapering the ceiling compared to the walls?
It is significantly more difficult due to gravity and the physical strain of working overhead. It almost always requires a two-person team—one to position the paper and another to support the strip’s tail to prevent it from pulling away.
2. Can you apply textured wallpaper to a ceiling that is already textured?
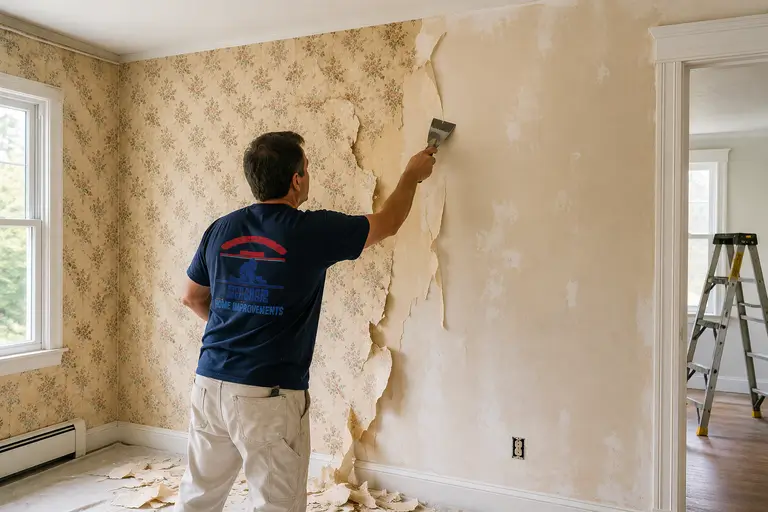
No. Wallpaper requires a smooth, clean surface to bond correctly. If you have a popcorn or heavily textured ceiling, it must be scraped, sanded, and skim-coated with joint compound before you can begin your wallpapering project.
3. How long does ceiling wallpaper last in a coastal climate?
With professional installation and proper sizing, quality wallpaper can last 10 to 15 years. Using moisture-resistant adhesives is key to preventing the edges from curling during our humid South Shore summers.
4. Do I need a permit to wallpaper a ceiling in Massachusetts?
No, wallpapering is considered a cosmetic interior finish and does not require a building permit in Massachusetts.
5. What is the best adhesive for wallpapering a ceiling?
A heavy-duty, clear strippable adhesive or a clay-based adhesive is best. These provide the high wet tack needed to hold the paper’s weight against gravity as it dries.